As a Dev Manager, I spend a good deal of my day looking at where tasks are in an iteration or sprint. Sometimes, I’m lucky enough to know by the name of the task what will be involved. However, at times when I need something a little more refined to be able to organize our work I use tags to define certain attributes on a work item.
Tags are basically a free text attribute. We can place anything we want in them to help with our processes. We can use tags that state what type of work will occur. Is is it going to take a modification to SSIS or is it a Power BI report. In our environment, we’ve only automated the release of database code for our Business Intelligence platform. So knowing this ahead of time, helps us during the planning of releases to our environments.
We can also use tags to define out the system or code base that an item affects. Setting the tag to the name of the report or the package allows me to run a query to get me a list of all the hours we’ve worked on bugs for a set system or code base. This can become a key metric when we try to justify additional resources or to justify a refactor of a system due to technical debt. Below we will go over the steps of adding tags to work items and building out an initial query to help derive some info from our work.
Adding a Tag to a Work Item
The process is pretty simple. We will start off by going to our backlog under the boards menu in Azure DevOps.

Once in our backlog, we will see any work items that have already been created for us. In this case we have two user stories already built for us as an example.

We then can select the work item and assign a tag to define certain aspects that we want to derive data from. In this case, we will open up the first user story and define a tag of ETL and Warehouse to it. This signifies that it will require a change to an SSIS package and it affects the Warehouse system.
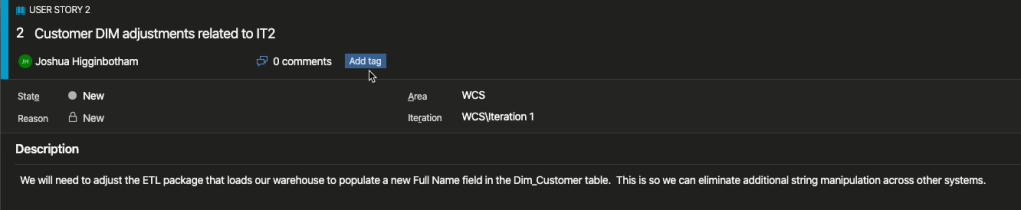
Once you select the work item, you will find the Add Tag area to the right of the assignment area. To add a tag, select Add Tag.
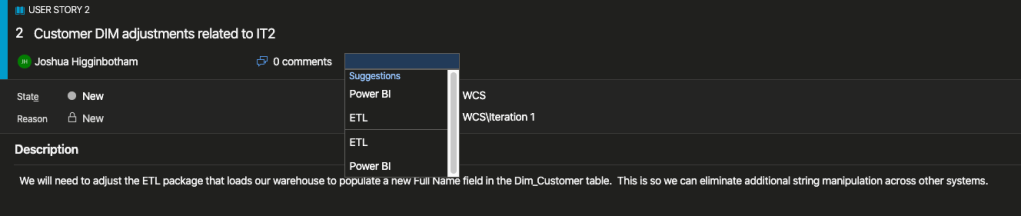
Any prior assignments of tags will show up in your suggestions allowing for you to reuse tags you’ve assigned before.

We will then select or add new tags to define ETL and Warehouse work is required for this User Story.
Reporting
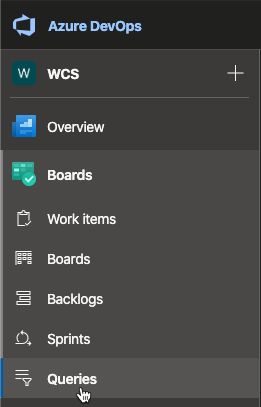
So now that we have tags assigned, what can we do with that info. We will start off by defining a new query that will allow us to pull back all the work being done against the Warehouse system. To create and or view queries in Azure DevOps, select the query button under the Boards section on your left pane.
Once selected, we will see an option to create a new query. Here we will define a query that will give us back all active work being done against the Warehouse system.


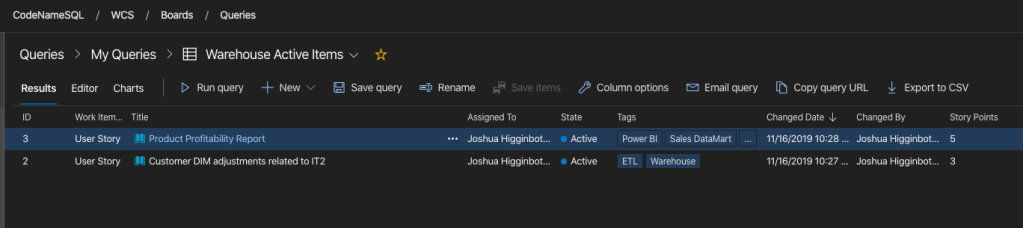
Once we feel we have built the query as required, we can either run the results or save the query so we can use it at a later time. In this case we will save it and then run it to review the results.

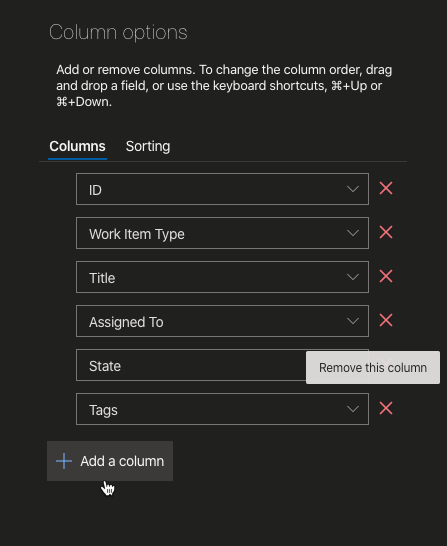
So we have the basic info pulled back. What if we want to see some additional details about the work item without having to go into each individual task. To do so, we can add additional columns to our query result set that will provide the info we are looking for. To add additional columns to the result set, select column options in the menu strip above your results.

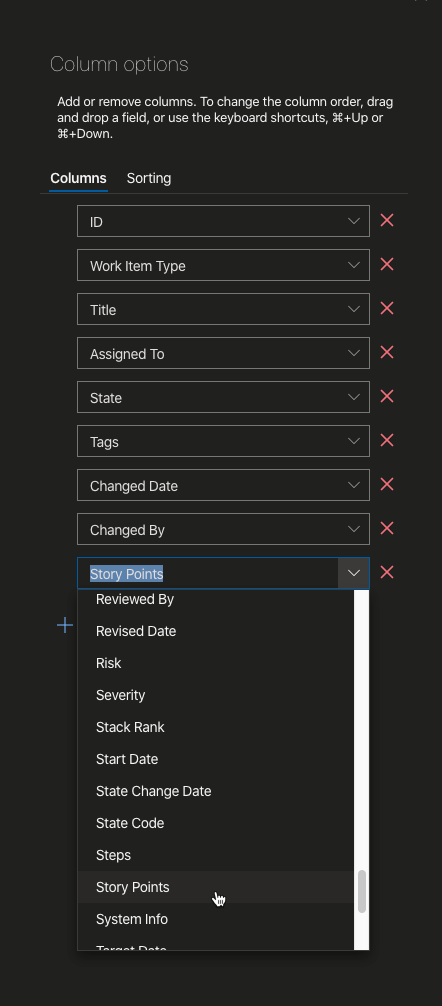
We then see the existing columns of our query in the right pane on the screen. This is where we can define new columns, remove any that we no longer require, adjust the order of the columns, or define a sort logic on the results. Here we will define three new columns. One showing the last time the item was changed, another on who made that change, and what was the Story Point assignment on the User Story.
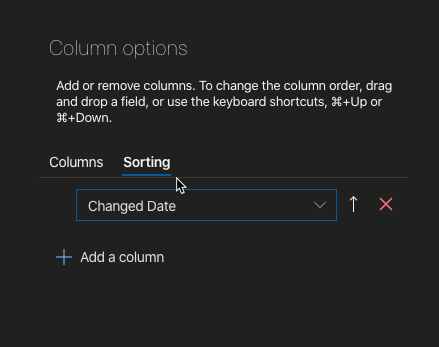
Once we’ve defined our new columns, we want to sort our result set by the Changed Date column. This allows us to see what items have been worked on recently and which ones we may want to reach out to get an update on.
Now that we have all of this set, we can hit ok at the bottom right of the screen to see the results of our newly formed query.
Using techniques like this, we can better organize our work. While this may not the way that some say it should be done, it’s worked for us when managing our daily work and release process. My hope is that this shows some of the ways we can use what’s provided in Azure DevOps to better organize our projects. If you’d like some additional info on tags, please see the Microsoft document here. Thank you for reading.
Categories: Project Management

Leave a comment